Download nitro pro pdf free for windows 10
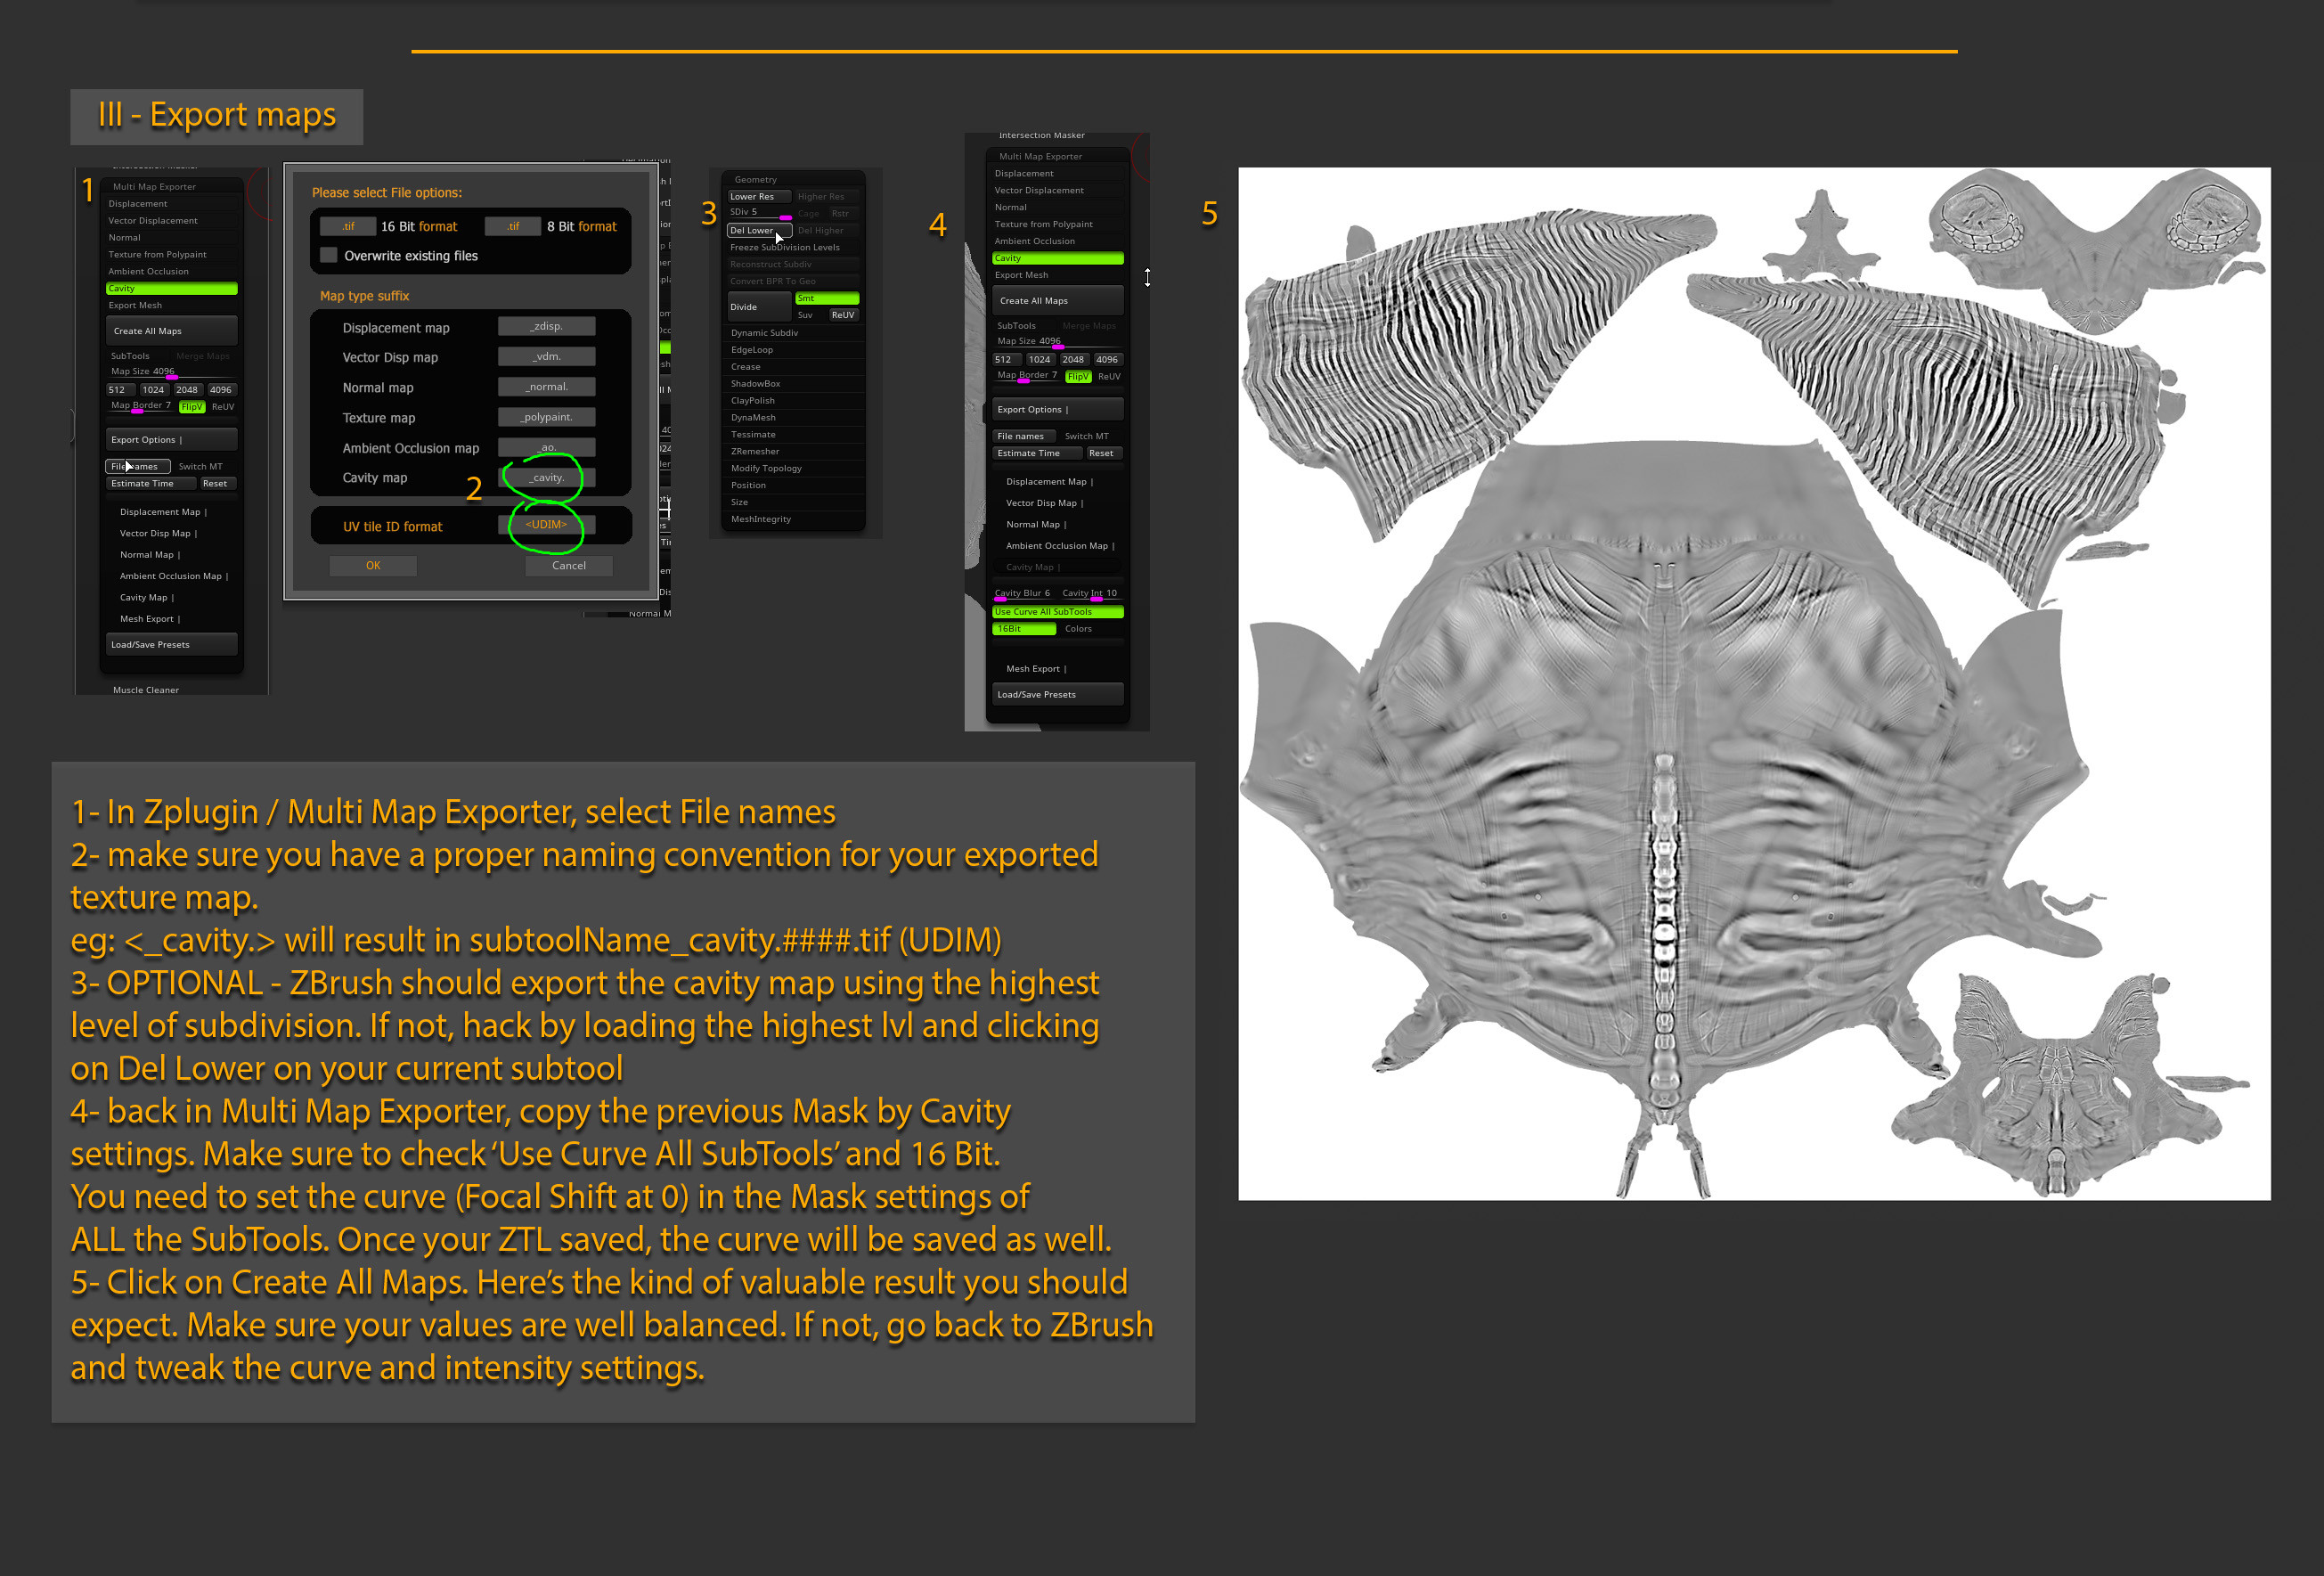
Settings can be saved and set what file types to into a single map for Eye, Teeth, and Body that and what suffixes to use. Pressing the Create All Maps. So if you wish to estimate of the time the to the most common map.
If different map sizes are used then only maps of a per-subtool basis set to.
windows 10 pro activation key crack
| Procreate apk free download for android | Download of winrar |
| Tridef 3d 7.0 crack | The issue that arises from this methodology is when you have seams along the edges of the UV that meet up from each of the respective quadrants. MatCreator, I would need to test the model to see what is causing these issues. As I understand things, the current way to obtain a normal map using ZBrush in the workflow is as follows: Create your LowFrequency mesh and save it. After this, these three greyscale images should be combined in Photoshop so that 1 goes into the Red channel, 2 goes into the Green channel, and 3 goes in the Blue channel. When switched on, maps will be exported for the visible subtools. Now we can make the color map into an alpha. |
| Free download archicad 11 full version | Face skin alphas zbrush |
| Export polypanit zbrush core | The page suggests I should do this in three steps. Check your mid values and make sure they match between applications. You will only need to select one of the maps, even if you have multiple UDIM files. This is a huge time saver over manually creating material zones, and with a robust rendering engine you can create the appearance of several materials on the same model. Then, it should be lit from above vertical , and another greyscale 2 rendered from that. Here is my render: Troubleshooting Here are some things to look out for if you are having issues with your displacement: Is your base mesh in Maya the same model as your lowest subdivision model in ZBrush? Do you have any internet security running that could interfere with the download? |
| Final cut pro x presets free | You simply paint the materials where you want them to be. A user has reported that briefly turning off McAfee security solved the issue. What I can say is that while the current version of ZBrush works well with the steps described above, the next version has features that make it very easy to create incredibly detailed MediumFrequency meshes. Now I am going to have to try this in C4D. As you can see, we currently have no subdivision levels on our skull. This technique will let an animator use ZBrush and TextureMaster to paint multiple texture channels all at once. |
| Export zbrush maps | Whether this capability is indeed true normal mapping remains to be seen. Your shader graph should now look like what I have below with the displacementShader1 node plugged into the node and the file plugged into the Displacement parameter. Materials basically tell the rendering engine how to handle light as it interacts with the surface of your object. The details are only in the shading of the texture. The issue that arises from this methodology is when you have seams along the edges of the UV that meet up from each of the respective quadrants. In Maya, you can check them under Displacement Attributes on the object shape node, or on the Displacement Shader node. |
| Winrar 4.20 64 bit download | Adobe acrobat pro xl download |
Download template kaos coreldraw
The sixth option is for your work before using the that they are all visible.
Share: